Monday, September 30, 2013

Harvesting


Harvesting

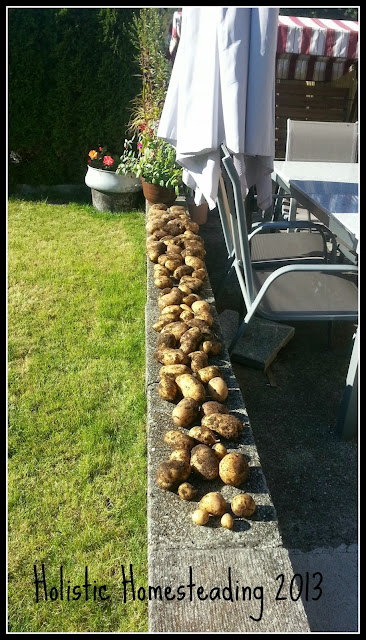
Stefan and I spent Tuesday afternoon last week in the garden pulling out the potatoes as it was time, they were nicely wilted and the we dug and dug and dug!
We ended up pulling out 12 kgs of potatoes all in all.

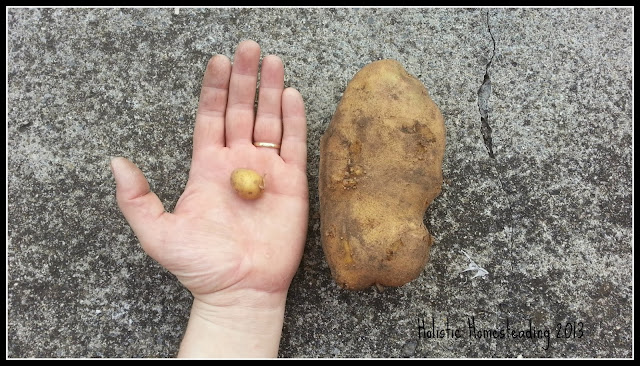
They went from really small, to REALLY big :)

potatoes from the garden


We laid them in the wonderful, warm afternoon sun to dry and then placed them in our potato crate to go into the cellar.

harvesting potatoes

harvesting potatoes

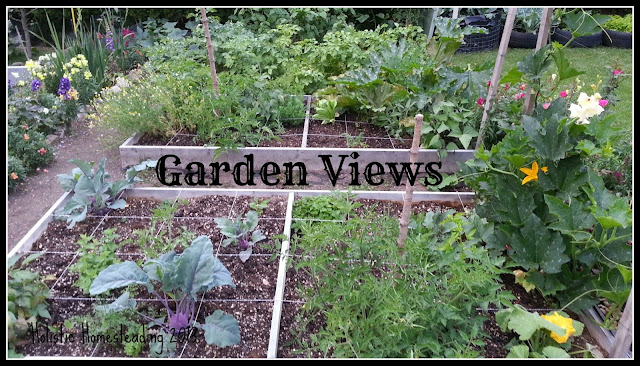
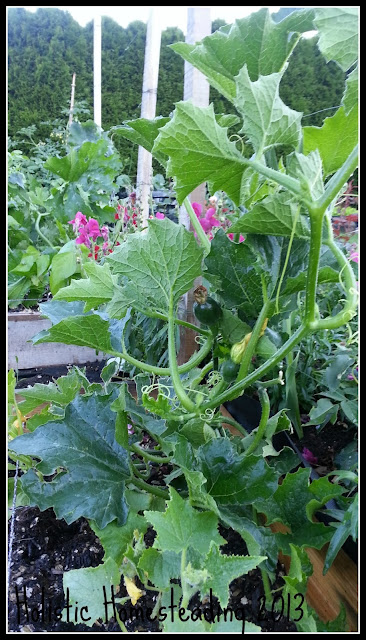
Besides the potatoes, we harvested some more beans, a couple of gems (so far have had 7 gems - yummy) and I continue to harvest a little chamomile each day in an attempt to collect enough from the garden for the winter months.

garden harvest

gemsquash

See you soon
x


My Food Storage - Free Shipping
Pin It!

Saturday, September 28, 2013

Soapy Mess!

Soap making adventures

URGH how unsightly!!

We unmoulded our cool black and white soap.

I couldn't wait to cut it and have a look at the cool swirls we had made.

The swirls were cool, hold on, back-up, what is that?
Yes, that! - Those little dots of powder!

Oh my, I know what it is!

Adding oxide to soap

Once we added our diluted oxide in its' oil we just weren't happy that the soap was quite white enough, so we thought we would just sprinkle some more on top of the soap and mix thoroughly. It doesn't work that way apparently!!

No biggie, these will have to be remade, now we have 20 bars of otherwise great looking and smelling bars curing for our own use ;)

curing soap

Watch this space for the new batch!

P.S. I am so excited, I got my first order for 40 bars of soap on Wednesday, how great is that?

See you soon.
x

Pin It!

Tuesday, September 17, 2013

Soap Unveiling :)

Calendula, Milk and Honey

I am so thrilled how this soap turned out! It smells amazing and looks rather cool if I do say so myself.

soap curing

This soap has now been placed on the curing rack (please excuse the bad cell phone image!) for the next couple of weeks to cure and then will be available in my Etsy Store for purchase.

I was so thrilled with this loaf that I decided to get right in and make another.
Stefan helped me with this loaf, those are his swirls ;)

soap making swirls

I will have the unveiling of this soap also tomorrow, so do come back then.

x

Shared this post with Frontier Dreams 


Pin It!

Monday, September 16, 2013

Calendula, Honey and Milk - Oh Yeah!


I have been promising you all a soap tutorial, which I did actually make about 2 weeks ago and then scrapped as it really wasn't good, sorry!
As soon as I have an extra hand to help me with the filming I will be back with the soap tutorial for you.

In the meantime I have been busy creating new soaps that will be available to purchase from my Etsy Store soon :).

Today's creation is called "Calendula Milk and Honey"

soapmaking

calendula soap

These bars have the added benefit of Calendula Oil which works wonders on dry, chapped skin. It looks great and smells heavenly already!

calendula soap

I can't wait until tomorrow! I will update as soon as I have unmoulded and cut it :)

See you tomorrow.
x


Pin It!

Monday, September 9, 2013

Chelsea Buns

Chelsea Bun Recipe

Chelsea Buns are a big part of my past and I have had a love/hate relationship with them through most of my youth, but as an adult and whilst living back in S.A. I used to indulge in this sweet pleasure as often as I felt the need to have some cinnamony sweet goodness between my teeth!

Today I want to share my recipe for these delights with you.
This is one of those recipes that I thought I would never be able to create on my own as I had only ever bought them, but I was pleasantly surprised at how easy they are to make.

For these you will need:
(makes 12)

500g Flour (I used white, but next time I will be combining with brown)
1 tsp salt
1 sachet of dry yeast (7g)
300ml milk (plus an extra 4 Tbsp for the glaze)
65g unsalted butter
75g sugar
1 Egg
2 tsp Ground Cinnamon
100g raisins or sultanas
4 Tbsp Caster sugar
Oil

  1. Sift the flour and salt into a mixing bowl, add the yeast.
  2. Place 40g of butter in a pan and start to heat. As the butter starts to melt add the milk and stir until the butter is completely melted.
  3. Add the milk/butter mix plus the egg to the flour and mix until a dough forms.
  4. Remove from bowl and place on a well floured surface and knead the dough. You may need to add a little more flour. The dough is the right consistency when it no longer sticks to your hands when kneading.
  5. Oil a bowl and place the dough into this bowl, turning it in the bowl so as to coat all sides with the oil.
  6. Cover with a lid or cling film and allow to double in size.
  7. Once doubled, remove from the bowl and punch back down. Roll out into a rectangle on a lightly floured surface.
  8. Melt the left over 25g butter and spread over the surface.
  9. Sprinkle the cinnamon, the sugar and the raisins over the surface and then roll up tightly into a log.
  10. Cut into 12 pieces and lay flat on a baking tray with baking paper.
  11. Cover and allow to rise for another 30 minutes.
  12. Heat the oven to 180° C
  13. Place the buns in the oven for 25 minutes or until golden brown.
  14. Whilst the buns are in the oven, make the glaze - take the 4Tbsp Milk and Caster sugar, place in a pan and bring to the boil. Allow to simmer for 1-3 minutes.
  15. Remove the buns from the oven and spoon the glaze over each bun.
  16. Allow to cool and enjoy with a nice cup of sugary tea ;)
Chelsea buns cinnamon buns


Pin It!

Friday, September 6, 2013

September Garden Update

September garden views

Today I want to share with you a September Garden Update.
It is so wonderful that our garden finally started to bring forth some really yummy produce!

This morning I fetched:
2 Huge marrows
1 Large cabbage
Some Purple beans
Elderberry

Garden produce

The Garden itself is looking great, I know that it kind of looks like there is always some empty space, but these squares usually have just had their produce removed.

Here are some photos of produce we have had the pleasure of eating lately :)

kohlrabi

Our "Kohlrabi" - I think it is known as German Turnip or Stem Cabbage

purple beans

A blurry image of our purple beans :(

Zucchetti

One of the "Big" Marrows :)

Gemsquash

Our first two gems, oh my gosh were they so good!!

How is your garden doing? 
Are you busy harvesting and storing?
Or are you just getting ready to plant your seedlings in the Southern Hemisphere?

Do go over and visit Marigolds' Loft for an awesome 2014 Diary Giveaway (with planting info)


Freeze Dried Food
Pin It!

Sunday, September 1, 2013

Feeding The World

At work this week we watched a documentary that has to do with the worlds wastage, and how we kill off our natural resources with greed.
I haven't been able to find this movie with too many english bits and I don't want to scare you by the gruesome facts of what we had to watch.

Here is a trailer of this film, if you are interested in watching it (the original is in german) the title is "We Feed The World"


Pin It!

Wednesday, August 21, 2013

Lathering Up - New Experiences

soap making

Oh wow, so much fun!
I think Stefan and I have found a combined hobby :)
It combines the cool chemistry experience with all the good whiffs of essential oils being mixed into one big bowl of soapy love!

I have wanted to do this experiment for the longest time and I am most definitely hooked! 

Do we have enough space for all the soaps I plan to be making - probably not.
Will that stop me from making all those soaps - probably not!

Stefan and I made a provisional mold and it worked out fabulously, albeit the bars turned out a bit on the biggish side, but we remedied this by cutting them in two. This batch is only for our pleasure any way so they didn't have to look all too pretty but I still think they turned out quite nicely!


Homemade soap

make soap at home

Don't they look cool?

And the smell....here you try....


Oh sorry, that doesn't work yet - would be great if it did!

Anyway, they have been put into their new resting home for the next 6 weeks to cure.

curing soap

For our first batch we followed the guidelines in Susan Miller Cavitch's book "The Soapmaker's Companion" a great resource if you are looking for a reference/how-to guide.


Keep your eyes pealed for more as this topic will most definitely be continued.....

Have you made soap yet?


MFS_a_728x90, Myfoodstorage
Pin It!

Monday, August 19, 2013

Garden Joys


Square Foot Gardening

The garden seems to be really coming into itself at the moment and it is with delight that I go and visit it each day :)

On Friday Stefan and I went out bright and early and pulled out the peas, the rest of the radishes and most of the carrots.
We pulled out the peas as they were overshadowing the marrows and I desperately want them to grow a little bigger. 

It seems to be working, because this morning I went to have a look and the marrows are already much bigger!

marrows zucchetti

And the best news of all - our gems are finally growing :)

gem squash

We have sowed different sorts of cauliflowers: Cheddar, Neckarperle, Universal and Violet Queen. I love them being all different colours, and I do hope they start to grow soon.

select cauliflowers

We also sowed some broccoli and some beets.

Here are the images from the garden once we had finished :)

bed 1 sfg

bed 2 raised beds

potatoes in blossom

How is your garden coming?
What have you recently sowed or reaped?

Pin It!

Friday, August 16, 2013

A New Experiment :)

cold process soap making

soap ingredients

I couldn't wait to share this little bit of news with you....

Look what arrived for me to play with (well "play with" is a bit of dangerous phrase when talking about Sodium Hydroxide amongst other things - hmmm - "create with" then :))

Stefan and I will be trying our hand at homemade soaps in the next while (am just getting all our utensils ready), watch this space for more!

x
Do you make your own soaps?
Pin It!

Monday, August 12, 2013

Bees - Summer Treatments

Bee Treatments summer

This week at my bee course we went through the process of treating the bees for the varroa mites as this is a big problem here in Switzerland, as it is world wide.

For the summer treatment we used Formic Acid in an easy to use compact Liebig Dispenser.

Liebig Dispenser Bio Vet

The bees were awfully aggressive and I got stung twice, so at the moment I have a wonderfully crease-free left hand, twice the size as normal - at least it should work wonders in the carpal tunnel department ;)

For the bees this is quite a stressing time and the colonies that were treated tended to hang outside the hives as I am sure the gases bother them quite badly too.

beekeeping summer treatments

If you are a beekeeper when do you treat your bees?
Do you treat them twice yearly?
What do you treat your colonies with?


Pin It!

Infolinks In Text Ads