Wednesday, January 30, 2013

Storage Planning


This is the wall of our cellar which we have just freed up to make space for  new storage possibilities. It looks quite small but it is approximately 2m wide, which will make for some good storage space.

With our growing garden plans for the coming season, I am hoping that we will be having lots to store and shelving - well-thought out shelving - is vital for this to turn into a well-rounded adventure.

We have our usual food storage on the other side of the cellar in an old wall unit, which suits our needs quite well as it houses all our bought stores of food like pasta, rice, oils, UHT milk, etc.

The new shelving unit will be there to assist with having a good overview of what we want to store.

We will update this space as it starts to take form.

See you soon.


Pin It!

Monday, January 28, 2013

Garden Planning - Square Foot Garden


Stefan and I have decided to go with Square Foot Gardening for this growing season, to see how it works for us. We don't have huge amounts of space and so it seems to be a logical choice.
I have been creating some planners for the garden as we want to know what we are putting where and how much of each we can plant.

This is the first planner I have created to this end:


If you would like to try this planner, you can grab your copy HERE

More on the topic of gardening soon.
x


Pin It!

Friday, January 25, 2013

Sprouting Bread?

Today I am going to share with you 2 recipes that include sprouted wheat.

The first recipe is Essene bread, which is made in the dehydrator, but definitely has an acquired taste, I like it, but I know of many who don't :)

The next recipe is a baked bread recipe, but I add the sprouted wheat to it for more nutritional value.

Both recipes require sprouted wheat.

To sprout wheat:

Place 2 cups of wheat/spelt berries in a container and cover with double the amount of water for 8 hours, and allow to stand, covered preferably over night.


Drain the water and place in the sprouter, rinsing twice a day.


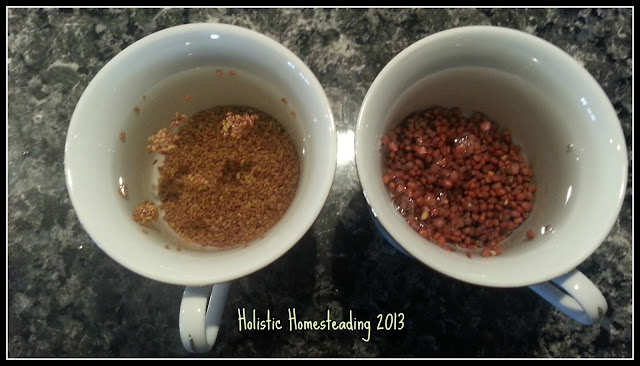
After emptying the sprouts into the sprouter, they already look like this:


On day 2 your sprouts should be ready and look something like this.


Essene Bread:

2 Cups sprouted Wheat/Spelt berries
1/2 cup dates chopped and soaked for 25 minutes
1/2 cup raisins chopped and soaked for 25 minutes

Grind berries until you have a gooey doughy consistency.


Add the chopped fruit and mix together again.
Form into flat rounds and place in the dehydrator on the lowest temperature (40 -50°C) for roughly 8 -10 hours, until dry.


Baked bread with Sprouted Wheat/Spelt
(This recipe I found online and modified it a bit to suit my taste :))

You will need:

2 pkts Dry yeast
2 1/2 Cups of warm water
1 tsp sugar
1/2 Cup Oil
1/2 Cup honey
3 tsp salt
2 cups sprouted wheat
6 - 7 cups flour

Stir sugar into warm water.
Sprinkle the dry yeast over the water, and allow to stand until it froths.

In another bowl, add:
4 cups flour, honey, oil, salt and sprouts (either whole or ground)


Add yeast and stir to form a doughy consistency.
Cover and place in a warm area for 45 - 60 minutes.
Knead the dough and then add a more flour, a little at a time to get the perfect bready dough.


Form into loaves, place on baking tray and cover again. Allow to rise for another 45 minutes.

Bake in a pre-heated oven (180°C) for 40 - 45 minutes.

Enjoy!


Pin It!

Wednesday, January 23, 2013

Dehydrator Recipe - South African Biltong


All South Africans know that life without biltong is very dull indeed, and living overseas does make that on it's own very trying. 
Biltong is similar to what the rest of the world understands under "Jerky" except that biltong isn't made with minced meat, rather with chunks or big pieces of meat.

The best cut of beef would be Silver-side, but as I am not sure how to call it in German, and meat is so costly here, I make biltong with beef ragout, or whatever I can get my hands on, preferably organic.

To make biltong, you will need:


  • Meat - however much you intend on drying
  • Spices - I am using the rest of my home-bought South African BBQ spice, but you can also use good old plain salt and pepper
  • Vinegar - I am using a herbed vinegar, but again, it will crystallize which you prefer the more you make it
  • A dehydrator or oven on very low heat. - We use our dehydrator for many an hour throughout the week, I love my Stöckli. (I will be talking about dehydrators at a later point)
Start by placing your meat in a container, and cover it with the vinegar.
Allow to stand for 5-10 minutes, stirring the meat now and then to coat it well. 


Once the meat has soaked for 10 minutes or so, empty the vinegar off the meat.


 Spice the meat really well. With the drying, the meat loses a bit of taste, so rather be a little heavy handed with the salt, as once it is dry it isn't really possible to re-salt it very well.


Once the meat is coated to your liking, place in the dehydrator and dry at 70° Celsius until dry.


Once dry, pack in individual bags and seal. 
That is if anything is left once it is finished, I rarely have anything to put away :) 

Hope you enjoy this recipe.

I will be back with many more in the upcoming months ahead.

We would love to hear from you, please leave your comments below.


Pin It!

Monday, January 21, 2013

Sprouting - How to start Sprouting

Today I want to show you how to go about starting to sprout.

Firstly you will need to decide which sprouts you would like to eat, in the beginning you will probably have to try a couple of different sprout types out, until you find the ones that you enjoy eating.


Some of the sprouts are a little bitter, like Fenugreek, although I find they enhance a salad Double-fold!


My rule of thumb is 1 heaped teaspoon of seed per layer of the sprouter.

If you are using a bottle for your sprouting, I would recommend you also to start with a Tablespoon for the first time, and thereafter you can adjust your amounts of sprouts to suit your individual needs.

If you find that you have too many sprouts once they are ready to eat, it is advisable to remove the rest of the sprouts from the sprouter and place them in a plastic container, in the fridge. That way you can still keep them for consumption for roughly a week once done.

Okay, so I am going to talk you through how I use our home sprouter.

Place a Tablespoon of seeds into a glass or container and cover with water (Make sure the seeds are well-covered and not just covered)


Allow to stand for a few hours - I tend to leave them to stand for anything from 4 - 7 hours.

Empty the seeds into your sprouter and allow the excess water to pour off.


You are ready to go.


Now rinse your sprouts 1-2 times a day and enjoy!

Here is my video I made for your convenience.


On Friday, I will share my Essene Bread Recipe Tutorial with you.
See you then.
x


Pin It!

Friday, January 18, 2013

Sprouting - Which Seeds?


After discussing the reasons why you should consider sprouting on Monday, I decided to post some benefits and a little more info about the sprouts available.

The variety of Seeds that one could sprout is pretty long.

There are "Easy" sprouts, but there are also some "Difficult" Seeds to sprout.

Some "Easy: sprouts would be:

Alfalfa
Fenugreek
Chickpeas
Lentils
Mung Beans
Sunflower 
Wheat

Some "Difficult" seeds would be:

Onion
Fennel
Linseed
Mustard

Another thing that you need to take into consideration is the fact that some seeds tend to "Slime" once they start to germinate. This can be a bit icky but if you combine the "Slimers" with other seeds you will find it happens less often. One of these good helper seeds would be Alfalfa, which not only helps with the slime forming seeds, but will also help other "Difficult" seeds to sprout.

Because of these seeds, I would recommend that if you are wanting to sprout a "Snack Pack" that you sprout your seeds individually and mix them once they are done.

Some health benefits of sprouts:

Alfalfa: Known to lower cholesterol, are anti-inflammatory, great for sugar control (Diabetes), super for bone health and they are high in anti-oxidants, and protein.

Fenugreek: Detoxifies, great for any kind of mucus problems (Flu, bronchial issues, hay fever), increases milk production, great for constipation. After the first handful of these sprouts, you will find that you start to smell like curry - especially in the armpit area - increases lymph drainage. Fenugreek is a constituent of curry powders.
Mung Bean: Increase longevitiy, decrease chances of heart disease, great for diabetics, a stress reliever and as a post-menopausal supplement
Lentils: Regulates water retention, promotes heart health.
Wheat: Anti-biotic, Anti-inflammatory, and tones.

Are you ready to try it out?

On Monday, I will show you how to go about setting up your sprouter.


If you have any questions or queries, please leave them in the comments below and we will answer you asap.


Pin It!

Monday, January 14, 2013

Sprouting - Why should you consider it?


Now we have started on the topic of Sprouting, and before we get into the various sprout types as well as the health benefits of sprouting, I thought it may be a good time as any to discuss why you should even consider sprouting in the first place.

There are some really simple, good reasons for sprouting:

  • The plants have not been sprayed (buy your seeds from a reputed stockist)
  • The plants are not exposed to the elements
  • They grow in any climate
  • They take roughly 5 days to be ready to eat
  • They do not produce waste
  • They have few calories, but include loads of minerals
  • Whilst the seeds grow into seedlings, they contain all the growing goodness that they require to become fully functional, healthy plants, which you benefit from - They are known as "Living Food"
  • Sprouts are alkaline forming - if you are paying attention to what you eat, you will want to limit your intake of acid-forming foods and sprouts are great for this. 
  • Most sprouts aid detoxification like Fenugreek
  • Most people find sprouts much easier to digest that the fully grown plant
  • They are an easy way to add worthwhile nutritional value to your meals and snacks throughout the day.
On Friday, I will discuss which sprouts you could consider and what the various sprouts are good for.
See you then.
x

P.S. If you have any questions that you would like answered, please leave them in the comments below.


Pin It!

Wednesday, January 9, 2013

Sprouting - Choosing the Right Sprouter for you


As I showed you our sprouts that came last Friday, I want to tell you a little about sprouting. 

I am going to break the info into 2-3 sections and am going to talk about the various containers we have available to use for sprouting today, and next week I will talk about what the various sprouts are good for and how long they take to sprout etc..

If you are a follower of my Blog (Marigolds' Loft) you will remember me posting about sprouting quite a while back.

I know that these days sprouting is something everyone has at least heard of,  and I am guessing that most of you have eaten sprouts either knowingly or not. 

If you are a big Chinese food fan, Mung Bean Sprouts are included in most dishes, from stir-frys to spring rolls!

Over the years we have had a large selection of sprouters, which we have used. 

We started sprouting the first time roughly 14 years ago, and this tradition is still going strong. I can't imagine not being able to use sprouts in our salads, on our sandwiches, or just to grab a handful as a snack on the way through the kitchen.

My first sprouting container looked like this: 

www.pure-life.ch

It was a container holding just over 3 litres, and we could really only do one sort of sprout in there. We found it a little too big for our needs, but I can imagine for folks who have a large family, or want to sprout a large amount of any one sprout, this could be quite a good container for them. Be advised though, it does take up some space, and doesn't really balance on it's head to empty the water. 


You can of course use this idea with any kind of container. 
You could use an ordinary pickle jar, with a piece of gauze to cover the top for a small amount of sprouts. This works really well, and if space is an issue is quite a good option.

Alfred Vogel also created some nifty sprouters like the one on the right in the above photo.

His company also have simple bottle versions like this:

http://www.bioforce.ch

I love this version of the bottle sprouter as it comes with its' own stand so that the excess water has the opportunity to run off properly and the seeds get aerated correctly.

Next we come to the layered sprouters. 

This is the BioSnacky I have in the photo above.

http://www.bioforce.ch

I really appreciate this system as it allows us to grow more that one sort of sprout at a time, they are well aerated and it has a sprinkler lid, so if you pour the water through the lid, it gently sprinkles over the top layer of seeds and continues to trickle down through the other layers. 
It has a catch bowl at the bottom, which is very convenient.

I used my BioSnacky for many years, and at the moment I have it tucked away in my cellar, as we came across another sprouter that is even cooler!

This is our Sprouter right now:


It is a Bio-Set Sprouter and the unique feature about this sprouter is that, unlike the BioSnacky which has pretty large holes in each tray (subsequently if you are sprouting seeds like alfalfa, you will need to add a fleece sheet to the tray to avoid the seeds being washed away), the Bio-Set has only one opening per layer, with a covering to avoid seeds blocking the water flow.


In the Bio-Set, we can sprout any seeds, any size, and the system also allows the seeds enough time to get sufficiently moistened as we fill up the cover tray with water and it slowly filters through to the next level. Once that level has reached above the water vent, it in turn will start to flow through to the next level and so on.

The top cover of the Bio-Set

The Bio-Set is also a little smaller than the Bio-Snacky, and it holds a tablespoon of seeds comfortably in each layer, making it the ideal sprouter for our household.

I hope this post has got you a little more interested in sprouting?!

Next week I will discuss the how to go about starting to sprout.

x
Natalie

We will be sharing this post with our lovely Link-Ups

Pin It!

Sunday, January 6, 2013

Garden Planning Stage 1

This Spring we are going to try our hand at Square Foot Gardening.

We are not complete novices at gardening per se, but we haven't really done it seriously either.

Until now we have just planted and reaped whatever came out of the garden, there was never much contemplation about how to do it and when to plant the seedlings, we used to, well more I (Natalie), used to be so impatient  and just sow the seeds any-old-how and hope for the best!

But this year we are going to go about it the proper way, planning and all!

As we had to order some new sprouts for our sprouter (more about that soon)
we decided to start to get some seeds so that as soon as the warmer weather gets here - it does feel like it is here already, 4 months too early :(,- we are ready to roll!

So this is what arrived on Friday:


We want to try the Jiffy Pro, which is a windowsill Mini-Greenhouse, and uses self expanding peat pots. Can't wait to see if it works. We will be starting in February to start our balcony plants. 

These will include:

St. Johns Wort
Passion Flower
Chilli
Cherry Tomatoes
Stevia
......as well as the typical Swiss Geranium, LOL, not a favourite, but unfortunately not really an option :( 


Our new Sprouts:
Alfalfa
Mustard
Mung Beans - Our Favourite
Fenugreek
Onion

We are a big sprouting family and have them growing all the time.
We will explain our various sprouting systems later on during this week.

Pin It!

Welcome to the First Post on Holistic Homesteading

Hi and welcome to the first post on this 365 day adventure that Hubby and I will be embarking upon.


We hope that you will find lots of tips, tricks and interesting facts along the way.

Here are some of the topics you will get to read about throughout this year:

  • Gardening
  • Storage
  • Tools and Equipment 
  • Alternate Energy Sources
  • Herbal Information, Wild and otherwise
  • Homemade goodies made from our own Produce

We look forward to sharing our experiences with you and hope you enjoy this blog as much as we will enjoy putting it together.


Pin It!

Infolinks In Text Ads