Saturday, July 27, 2013

Saturdays - Curried Onions

curried onions recipe tutorial

I love pickled onions in all the variations and so I am going to share a great recipe which I like to make to use up bulk onions when I have them or buy them. This is a curry, sweet-sour kind of pickled onion and it takes 4 days to make.

For this recipe you will need:

1- 1.5kg onions
1/2 Cup Salt
2 Cups white wine vinegar
2 Cups water
2 Cups sugar
3 tsp Curry powder
1 tsp Peppercorns

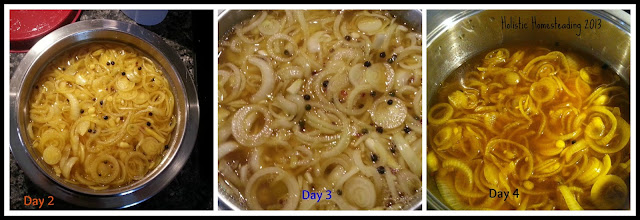
Day 1: Slice the onions very finely, place in a bowl and cover with salt. Stir to cover all the onions, and then cover with a lid allowing to stand.

Sweet sour onions

Day 2: Pour off liquid and rinse the onions thoroughly, place back in the bowl. Place all other ingredients in a pot and bring to the boil. Pour, still hot, over the onions and cover. Allow to stand.


Süss sauer Zwiebeln

Day 3: Pour the liquid back into a pot and bring to the boil again. Again pour, hot, over the onions and allow to stand.

Day 4: Place all the ingredients in a pot, bring to the boil and fill into sterilized bottles.


curried onions


There you have it. 
Great to eat with cheese, raclette, or if you are like me, consume on their own - yummy :)

Pin It!

Saturday, July 20, 2013

Saturdays - South African Koeksisters

South African Koeksisters

Today I would like to share another South African favourite - Koeksisters!
If you have a sweet tooth, then you want to be trying some of these delightful little braids of goodness!
For all you other homesick South Africans out there, a really easy recipe that you can follow along and be rid of just a little more homesickness :)

For the Dough you will need:

1 1/2 Cups of flour
4 1/2 tsp Baking Powder
1/4 tsp salt
20g Butter
150ml milk
3 - 4 cups of vegetable oil (I use sunflower)

For the Syrup you will need:

1 Cup of water
2 1/2 Cups sugar
2 tsp Lemon juice (or the juice of 1 lemon)
1 tsp Vanilla Essence (Optional)

First start by preparing the syrup.

koeksister syrup

Bring the water and sugar to a boil and allow to boil for a further 8 minutes.
Remove from the heat and stir in lemon juice and vanilla essence.
Pour into two bowls and place in the fridge. You will be using the bowls of syrup alternately to keep them cool.

Now make the dough:

Koeksister dough

Place the flour, salt and baking powder in a bowl. Add the butter and knead into the dough with your fingers. Now add the milk and mix until you have a firm, but light dough.

South African Koeksisters how to

Roll out the dough until it is relatively thin (a couple of mm thick) and then cut with a pizza wheel into strips and if too long, down the middle also. 

how to make koeksisters

Now plait/braid your strips into small plaits and lay aside.
Fetch out a bowl of cold syrup.
 Leave the other bowl inside the fridge and after 2 sets of koeksisters from the hot oil, swap the bowls and place the warm syrup back into the fridge to cool down again.

koeksisters south african

Heat the oil and fry the koeksisters, 3 or 4 at a time.
Turn once lightly brown to brown the other side. 
They should have a golden colour to them when you remove them from the oil, don't let them get too dark.
Remove from the oil and place directly into the bowl of syrup. Count to 5 and turn in the syrup. Count to 5 again and place the koeksister on a wire-rack to cool.
When they are cool, place them in a container and keep in the fridge. They taste better after cooling down for a while and they taste better and better the longer they are in there!

And there you have it!
South African Koeksisters. Try to not eat all in one sitting :)

yummy koeksisters

I would love to hear from you if you have made these.
 How did they turn out?
Did you like them?
Until next time
x


Cookie Lineup
Pin It!

Thursday, July 18, 2013

Garden Update

Square foot gardening

Finally we have had some sunshine and some really nice weather in-between the wet, rainy spells.
Unfortunately, because we had such harsh beginnings to this season, we have had to replant and resew many of our chosen seeds.
Amazingly, the seedlings we planted out in the early spring are taking forever to grow and are almost still the same size as when we planted them :(
We are holding out for an Indian summer in the hopes of giving our garden a little surviving chance and that we can have something to store for the winter!

So far we have managed to reap the following produce:

About 30 Radishes
Enough Salad for 2 meals
and 154g peas.


Peas

Not too great, but we are positive that it will turn around.

This is how our garden is looking at present:


square foot gardening layout

square foot gardening layout sfg

As you can see, some squares have changed over this period due to the need for replanting or because we have emptied them of produce. Due to the rains etc. some of the plants have already flowered and have had to be removed.

square foot gardening

SFG planning

We had lots of potatoes in the cellar that had eyes and so we started an extra, ordinary bed with these in it. They are growing wonderfully.

potatoes

Do you have a good book that you could share with us?
We have started a Linky Party for Homesteading Resources and we would love to have you come and link your posts telling all of us about those books. 
You can link your resources HERE

Do come back tomorrow (Saturday) where I will be sharing with you another favourite South African Recipe - Koeksisters :)

See you then and thanks for visiting.
x

Pin It!

Monday, July 15, 2013

New Books!


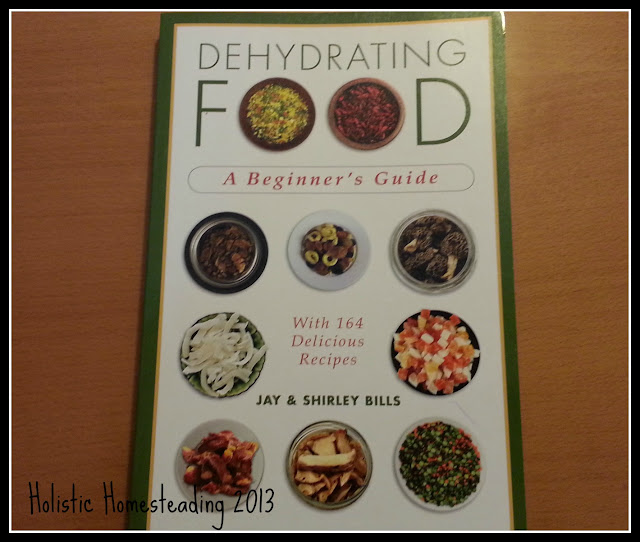
I received my copy of "Dehydrating Food" which I have been waiting quite a while to get. 


Dehydrating Food

I think it is quite a nice resource especially for beginners.
The first section of the book gives you tips and tricks on how to dehydrate your produce correctly and the second section has a whole lot of recipes using dehydrated foods. 

As soon as we have collected enough fruits and food that are dehydrated I will be trying some of the recipes out an will let you know how they turned out.

Have you got your hands on any new, great resources lately?
We would love to hear all about what you are reading.
Post about your latest find or favourite resources and link them up below.

We will gladly visit each of the links posted here and look forward to making this a monthly link up resource party :)

Pin It!

Saturday, July 13, 2013

Saturday Sandwich Spread


Most South Africans will know the feeling of missing some home goodness that is not available in non-English speaking European countries. Either you get on with life knowing you probably will, at some point have to find a way of importing the products you are missing, or you are going to have to start making the stuff yourself.

This time around living in Switzerland, I have chosen the latter and have started making all the goodies on my own. The only thing I have yet figured out how to make, and I don't think I would actually consider making it, is Marmite.

Today I would like to share a recipe to make Sandwich Spread, another South African favourite.

Sandwich Spread is one of those things that you either love or you hate - we love it in our home. We used to be able to purchase it, but it has since disappeared from the shelves and it is such a pity. There is nothing nicer than Sandwich spread on hot-buttered toast, or as a tangy sandwich spread to accompany ham, salami or to just eat on its' own.

Onto the recipe:

For this recipe you will need:
sandwich spread recipe home made


4 Carrots
3 Bell Peppers
1 Cucumber
1 large onion or 2 small onions
750ml White wine vinegar
500ml Mayonaisse
3 Tbsp Condense-milk

Start by peeling and grating the carrots, and grating the cucumber.
If you like smaller pieces then peel and whiz in a food processor.


sandwich spread

Slice the peppers and onion very finely and add to the bowl


onions, carrots, bell peppers

Mix together with your hands, and then cover with the vinegar.


sandwich spread recipe

Cover and allow to stand for 24 hours.

The next day, sieve the veggies and bottle the vinegar (I like to use it in my sauces etc)
Now add the mayonnaise and the condensed milk.


sandwich spread

It should look nice and creamy once done, and should taste slightly tangy.


condensed milk

Fill into bottles and date. It makes a good 3 and 1/2 jars of Sandwich Spread and I like to keep them cooled in the fridge until I need to use them.


Homemade Sandwich Spread

I would love to hear from you if you have made some for yourself. Did you like it, love it or dislike it?


Pin It!

Thursday, July 11, 2013

First Real Produce!

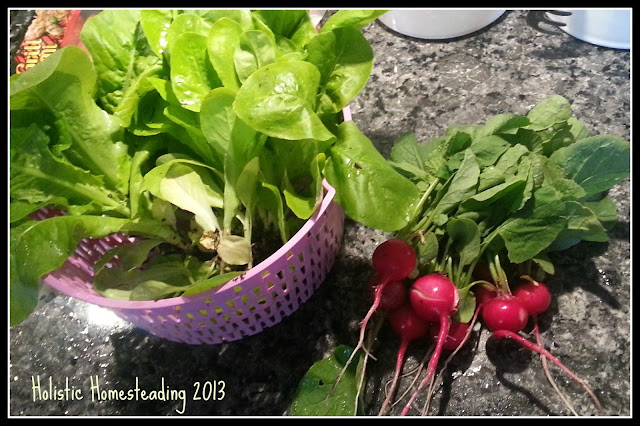
Own prodcue

Look at that delightful salad and the plump radishes!
This is our first produce we have been able to get out of the garden, and it was delicious.
As soon as we have picked all the radishes, I will be sewing another batch of them.

We will be sewing another couple of heads of lettuce again and then we will fill the beds with autumny veg I think.

When do you plant your fall veg?

Pin It!

Tuesday, July 9, 2013

New Day, New Recipe - South African Chutney

Mrs. Bs Chutney homemade

As I am on holiday this week I have decided to keep myself busy by catching up on my preserve making.

Today I made some South African Chutney (tastes very close to a well known brand that we all love and cherish by the way!) I think the rest of the world would call it "Relish" or Relish would be the closest thing to Chutney.

What I did have a problem with this year was finding dried peaches, but what am I if not the Dehydrator Queen LOL:) So I waited until peaches came on special and grabbed some, dried them and then rehydrated them again - easy!

Why bother drying them if I am going to put them back into liquid you ask?
It has to do with the final consistency, a dried fruit is a little different to fresh in that it gives the chutney those fruit chunks, which with the fresh fruit would not have been there, then it would have been more jammy.

I am not going to share the recipe with you all again today as I did share it as a photo-tutorial last year on Marigolds' Loft.

If you want to try this recipe out you can find it HERE

I would love to know if you tried it, and what you think of it.
Do you use a kind of chutney with your cuisine?
Pin It!

Monday, July 8, 2013

Garden Views

We were hoping that our Square Foot Garden experience would be a rich, rewarding experiment, and I think, if the weather played along more than on just the rare occasion it would have been just that!
Our spring started off well and then we went right back to the middle of winter, of course only once we had planted our seedlings and sewed our seeds :(
This resulted in us having to re-sew seeds and replace seedlings as most of them had got a little more than just frostbite.

Now finally in the middle of July, the ground is just about warm enough to induce growth!

Most Swiss people knew this would have been the case though, as apparently we are in a moon year, according to the 100 year Calendar, which means continual rains throughout the season!

Stefan took a photo of our garden as it looked yesterday morning:

square foot garden

Raised bed gardeneing

As you can see some of the plants like the peas and the bush beans are growing well so far. 

Other creepers like the gem-squash, butternut and watermelon we have had to re-sew - I do hope they will still have a good enough chance to grow and am crossing my fingers that we have an Indian summer :)

As you may see each little square is showing signs of greenery, let's hope that it will prosper. 

I still love the fact that the earth is so wonderfully loose, and I can loosen it with my fingers which is super.

Here's to a cellar filled with winter produce :)

Pin It!

Saturday, July 6, 2013

Saturday Baking

banana bread

I am finding, and I don't know if this is an age thing :O, that I spend my Saturdays lately figuring out what I can bake, or dehydrate, or which preserves I can make.....

Today has been no exception!

I bought quite a couple of bananas over the last week (as this is not the continent to grow them unfortunately :( ). 

Stefan makes the most amazing Banana-Milk in the mornings and I always like to make sure we have enough fruit for this. I love this shake, mainly because he makes it with just the right amount of bananas, milk and a good portion of love. It tastes out-of-this-world good and it has so many great properties which I think is great too! The perfect breakfast on the run :)

As the weather has turned again, we once again have sunlight - yahoo! the bananas are already quite speckled. So what is there to do with speckled bananas - make banana bread of course!

Here is my recipe for Banana Bread - the original recipe was from my trusty South African Cook Book but I have adapted it slightly as I like to use a lot of bananas for that extra banana taste!

To make this loaf you will need:

4-5 ripe, speckled bananas
1-2 Cups of Wholewheat Flour (depending on the size of the bananas)
1 Cups of White Flour
1 Cup of sugar
120g butter
2 Eggs
65ml Water
1 1/2 tsp Baking Poweder
1 tsp Bicarb
Pinch of salt

1. Cream the butter and sugar
2. Mash the bananas and mix with the sugar and butter
3. Beat the eggs, and add to the mix one at a time.
4. Sift the flour and salt into the mixture
5. Dissolve the Bicard in the water and add to the mix.
6. Add the baking powder.
7. Pour batter into a silicone or greased loaf tin and bake at 180°C for approx 45 minutes.
8. Allow to cool completely and enjoy with your favourite cup of tea or coffee!

I am sharing this post over at Tutorial Thurdays Linky Party

Pin It!

Infolinks In Text Ads